
July 2012 News
- Mother’s Day — May 13, 2012
by Kit Wertz
 This will be my second Mother’s Day as a mom of twins and just thinking about my little ones brings happy and joyful tears to my eyes. I waited a long time to be a mother and know it will still be a few years before my son and daughter start to give me their own floral designs, homemade cards, and macaroni necklaces to show me their love every May. Right now, they show me their love every DAY with their scrunchy-nosed smiles and squeals of delight over a new place we’ve gone to explore together (at The Getty Museum photo at left). I am in constant awe of them. They help me rediscover the world every day when they point out blooming wildflowers on a trail near our home, or a plain old crow flying in the sky or even a jet airplane flying 30,000 feet above us. It’s been a long time since I noticed any of these everyday things in life and having children reminds me of how amazing the world can be.
Instead of writing about the 2012 gifts for Mother’s Day (okay here’s one, flowers!) … or what the Most Popular Flowers Sent on Mother’s Day each year include (roses and calla lilies are in the list), I just wish you and the special mother in your life a Happy Mother’s Day.
But, because this is a floral design newsletter and not a mommy blog, here is a flower design how-to for you in case you want to make a fabulous Mother’s Day gift for your mother, wife, sister, aunt or friend.
Spring Time Floral Design How-To Featuring Ranunculus
by Kit Wertz

This is a design we taught in April at our floral design studio in Torrance.
This asymmetrical centerpiece or focal piece is a stunning spring-time design that features the bulb flower Ranunculus. You can grow these luscious blooms in your own garden and when they burst up in spring, cut a few to make this fun design.
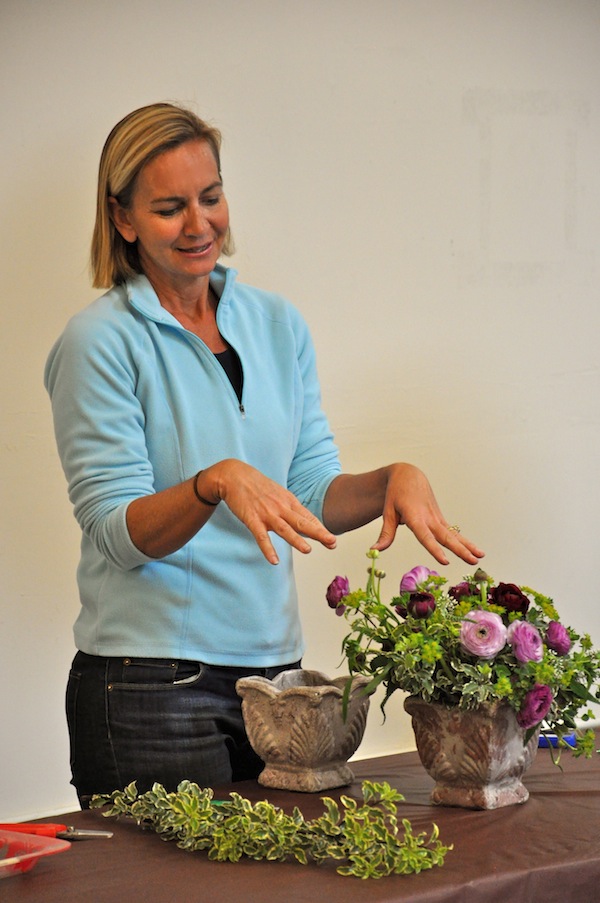
Casey teaching the class in April 2012.
Flowers Needed:
 2 bunches of Ranunculus (20 stems of blooms. Try to find some large and open blooms and some smaller blooms to add variety to your design)

1 large stem of Variegated New Zealand Pittosporum (you can grow this shrub in your own garden in SoCal)

3 stems of Bupleurum

7 stems of white Veronica
Supplies Needed:
Footed watertight container that holds 1/2 brick of wet floral foam snugly
1/2 brick soaked floral foam
Floral cutters or florist’s knife
Knife (to carve foam)

Step 1: Place ½ brick foam into a container that is watertight. A footed container lends itself nicely to this asymmetrical design. NOTE: Usually, when using floral foam, it’s best to place the foam in the container or design bowl so the writing on the foam is facing up toward the top of the design. This is because of how the foam “wicks water” from the bottom reservoir of a container. In this particular vase, we can keep the brick of foam completely wet by filling up the container with water when we are finished with the design, so it is not as important to use the foam’s natural wicking qualities. Keep the foam wicking qualities in mind if you are working with floral foam in a low design bowl where it would be impossible to keep water surrounding the foam.

Step 2: Trim the foam so that the corners are flattened. This makes it easier to insert stems into the corners of the design.


Step 3: Starting with the New Zealand Variegated Pittosporum, separate the stems so you have two long stems and some short ones. Place into the foam as shown with a tall one shooting out the left and then the next longest stem down to the right. Add the other shorter stems all around the periphery of the foam to cover the green foam so you can’t see it very well. Leave the middle of the foam open for now.

Step 4: Add some Bupleurum to the design. Mimic the placement of the Pittosporum and continue to cover the foam. Reserve some Bupleurum to add at the end of the design.

Step 5: Now, place the “money” flower or the Ranunculus stems. Look through your collection of stems and choose a few large blooming stems to be the low, focal flowers. Reserve the smaller blooms for the tall parts of your design. See how I’ve placed the larger blooms in the middle of the design and the smaller ones out to each side of the design?

Step 6: Place the Veronicas so that they add whimsy to the feel of the design and fill in with the Bupleurum so you cannot see any green foam.
Floral Design tips:

Tip 1: Don’t keep your stems in the plastic wrap too long or you may get stem rot. See these blooms did not make it. Moisture collected inside the plastic wrap and caused the stems to rot. All I could do with these blooms was to cut off the flowers and float them in a bowl.
Tip 2: Make sure no greenery stays on the stems below the “foam,” otherwise, the leaves will break down in the foam and cause the blooms to fade faster.
Tip 3: Pre-poke holes in the floral foam for soft-stemmed flowers like Ranunculus. Decide where you are going to place a flower and pre-poke a hole using a bamboo skewer or other discarded stem. Then, place your flower.
Tip 4: Separate your greenery to make the most of it. Use it all if you can!
Fresh Cut Lilacs: How to Keep Lilacs Alive in a Vase
by Kit Wertz

I was delighted to find lilacs at my local farmer’s market last week. The lilac farmer is from Castaic Lake and she said that the bushes are peaking quickly due to the warmer weather, so this might be the last week they are available.
I picked up a 6‑stem bouquet for $7.50 that included three colors of blooms…dark purple, lilac and white and it brings such a wonderful fragrance into the home! My husband even loves the smell! As with many woody stems, it’s hard to keep lilacs happy in a vase.
Even with special care, expect the cut lilacs to last only 3–5 days in a vase. Here are Flower Duet’s tips on keeping lilacs alive in a vase:
Remove all the leaves from the stems…as with hydrangea, the leaves are thirst mongers…so removing the leaves helps to keep the water from the vase going to the blooms.

Cut the stems at a 45 degree angle with a really sharp floral knife or floral cutters in a bowl of warm lukewarm water that has floral food mixed in it to get all the air bubbles out of the stem. Do not smash the stems with a hammer. The key to getting water up the woody stem is to keep the cut sharp. Upon close inspection of the stem, you’ll see a “cottony” middle part of the stem and that is where the water is sipped by the flowers. This must stay open in order for water to get up to the blooms.
Place in a tall vase full of warm water that has floral food in it.
Keep the vase full with floral food and water mixture each day.
Keep the flowers in a cool spot away from direct sunlight.
Most people cannot grow lilacs in Southern California, but there is a type of lilac that has been adapted to grow here. Here are some tips from Sunset Magazine on growing mild climate lilacs in Southern California.
If you just love liacs and can’t get enough of them each spring, check out this annual festival May 19 and 20, 2012 at the Pine Mountain Club (just over the grapevine off the 5) or down in Julian, California if you live closer to San Diego than LA.
FREE Video: How to Design One Dozen Roses in a Vase
Check out the latest video in our YouTube channel
We continue to add more free videos to our YouTube channel. Casey appeared on behalf of Flower Duet for the 2010/2011 and 2011/2012 seasons of Creative Living, which airs on PBS stations across the country. We are able to air these segments with the permission of Creative Living via our channel on YouTube!
This month, Casey shows Sheryl Borden from Creative Living how to design the classic dozen roses in a tall vase using only roses, greenery and waxflower. This is a skill that every floral designer must know! Now you can, too!
Subscribe to our YouTube channel: fashioningflowers so you’ll know when we’ve uploaded a new show!
Book Review: The 50 Mile Bouquet

The 50 Mile Bouquet: Seasonal, Local and Sustainable Flowers by Debra Prinzing
From Amazon.com:
“Most flowers on the market today are imported, mass-produced and chemical-laden. The 50 Mile Bouquet introduces some of the innovative voices of the dynamic new Slow Flower movement: the organic flower farmers, the sustainably-motivated floral designers…and the flower enthusiasts…”
Casey and I have been reading about this upcoming book for a while and are delighted to report it is now available to purchase in hardcover format only. This book focuses on the farms and studios of these “slow-flower folks” with lovely and intimate photography. The book includes these lengthy and informative chapters: Portrait of a Flower Farmer, The Eco Designer, The DIY Bouquet, Celebrations and Festivities, and Flower and Foliage Resources. The forward is by our favorite flower author, Amy Stewart, author of Flower Confidential.
It has received wonderful reviews from garden and book enthusiasts alike including this from Kathleen N. Brenzel, Garden Editor SUNSET magazine:
“The 50 Mile Bouquet is a flower book for today … inspiring, beautifully photographed, filled with advice on buying, growing, harvesting and arranging blooms that are truly fresh, locally-grown.”
Floral Design Tool: Florist’s Knife

How To Use a Floral Knife…Safely and Effectively
In our tip in this month’s newsletter about keeping lilacs fresh in a vase, we talk about the importance of a sharp cut on the stems. The best way to achieve a sharp cut is with a floral knife. We recommend the Victorinox Floral Swiss Army Knife for advanced floral designers. In our classes, we use our favorite floral bunch cutters to teach beginners, but when you are getting more serious about floral design, it’s time to switch to the floral knife. In case you don’t know how to use a floral knife, here are some tips:
- Keep the blade closed when you are not using it.
- Do not place fingers under the knife when cutting.
- Do not cut stems on tables or a cutting board.
- Never touch the blade with your thumb to gain leverage as you cut. Keep thumb in hitchhikers position when cutting towards it.
- Do not use the thumb as a brace, but as a guide.
- USE CAUTION!!! These are tips…but if you really want good instruction on how to use a floral knife, ask a professional florist to show you how to properly use a knife.
Here are photos to help guide you in proper handling of a floral knife:
If you are right-handed, hold the stem in your left hand with a firm grip.
Fingers should have a firm grip on the knife as shown.

Thumb stays in the “hitchhiker’s position” during the cut. Pull the knife toward the end of the stem at a 45-degree angle while also pulling the knife “through” the stem. Your right elbow should be moving to the right as you pull the knife down and through the stem. That way, you use the entire blade to cut the stem. NOTE: Your thumb should never touch any part of the blade.
 Here is the result of the cut — nice and sharp at a 45-degree angle. Notice how you can see the cotton inside of this rose stem. This needs to stay open in order to drink up the water in a vase.
Sign Up for Newsletters
Sign up for the free newsletters we write based on our daily experience as wedding and event floral designers in trend-setting Los Angeles.
Based near the Beach in the South Bay of LA, Kit & Casey take you on a journey each month to our events we create and share with you the hottest trends in floral design.
As sought-after floral design instructors, you’ll learn the latest tips and tricks of the trade.
Each month, we cover a current event in the floral trade, florals from real weddings, our latest flower adventures and endeavors, design tips, current floral trends, floral design classes and workshops, book recommendations and floral tool tips.
Since 2010, we’ve created a hot list of what’s on for floral design in and beyond Southern California. As guest speakers inside and outside of California, we know what clients need in the wedding and event industry. We are your trusted resource for floral design tips and techniques for all levels of the flower enthusiast.
We are Kit Wertz and Casey Schwartz, the sister design team of Flower Duet. We are committed to educating our students and fans since we started our floral design business in 1999.
We don’t share our email list with anyone! So, you can rest assured, your email is safe with us.